Operation
First boot initial setup
The following process is required when you boot your Meteor Pro for the first time. This process takes 5 minutes and will guide you throw some essentials required for you and your Meteor to be able to communicate with others.
A reboot of the Meteor is required to change certain settings. Don't worry if the Meteor reboots after changing settings and clicking on "Save".
-
Attach the supplied antenna securely to the RF connector. Using only 2 fingers screw on the provided antenna on the RP-SMA antenna connector (3). Stop screwing once the antenna is flush with the enclosure.
-
Press briefly and immediately release the Power button, wait 5 seconds. The indicator LED lights up and the Meteor is now
ON."ON". -
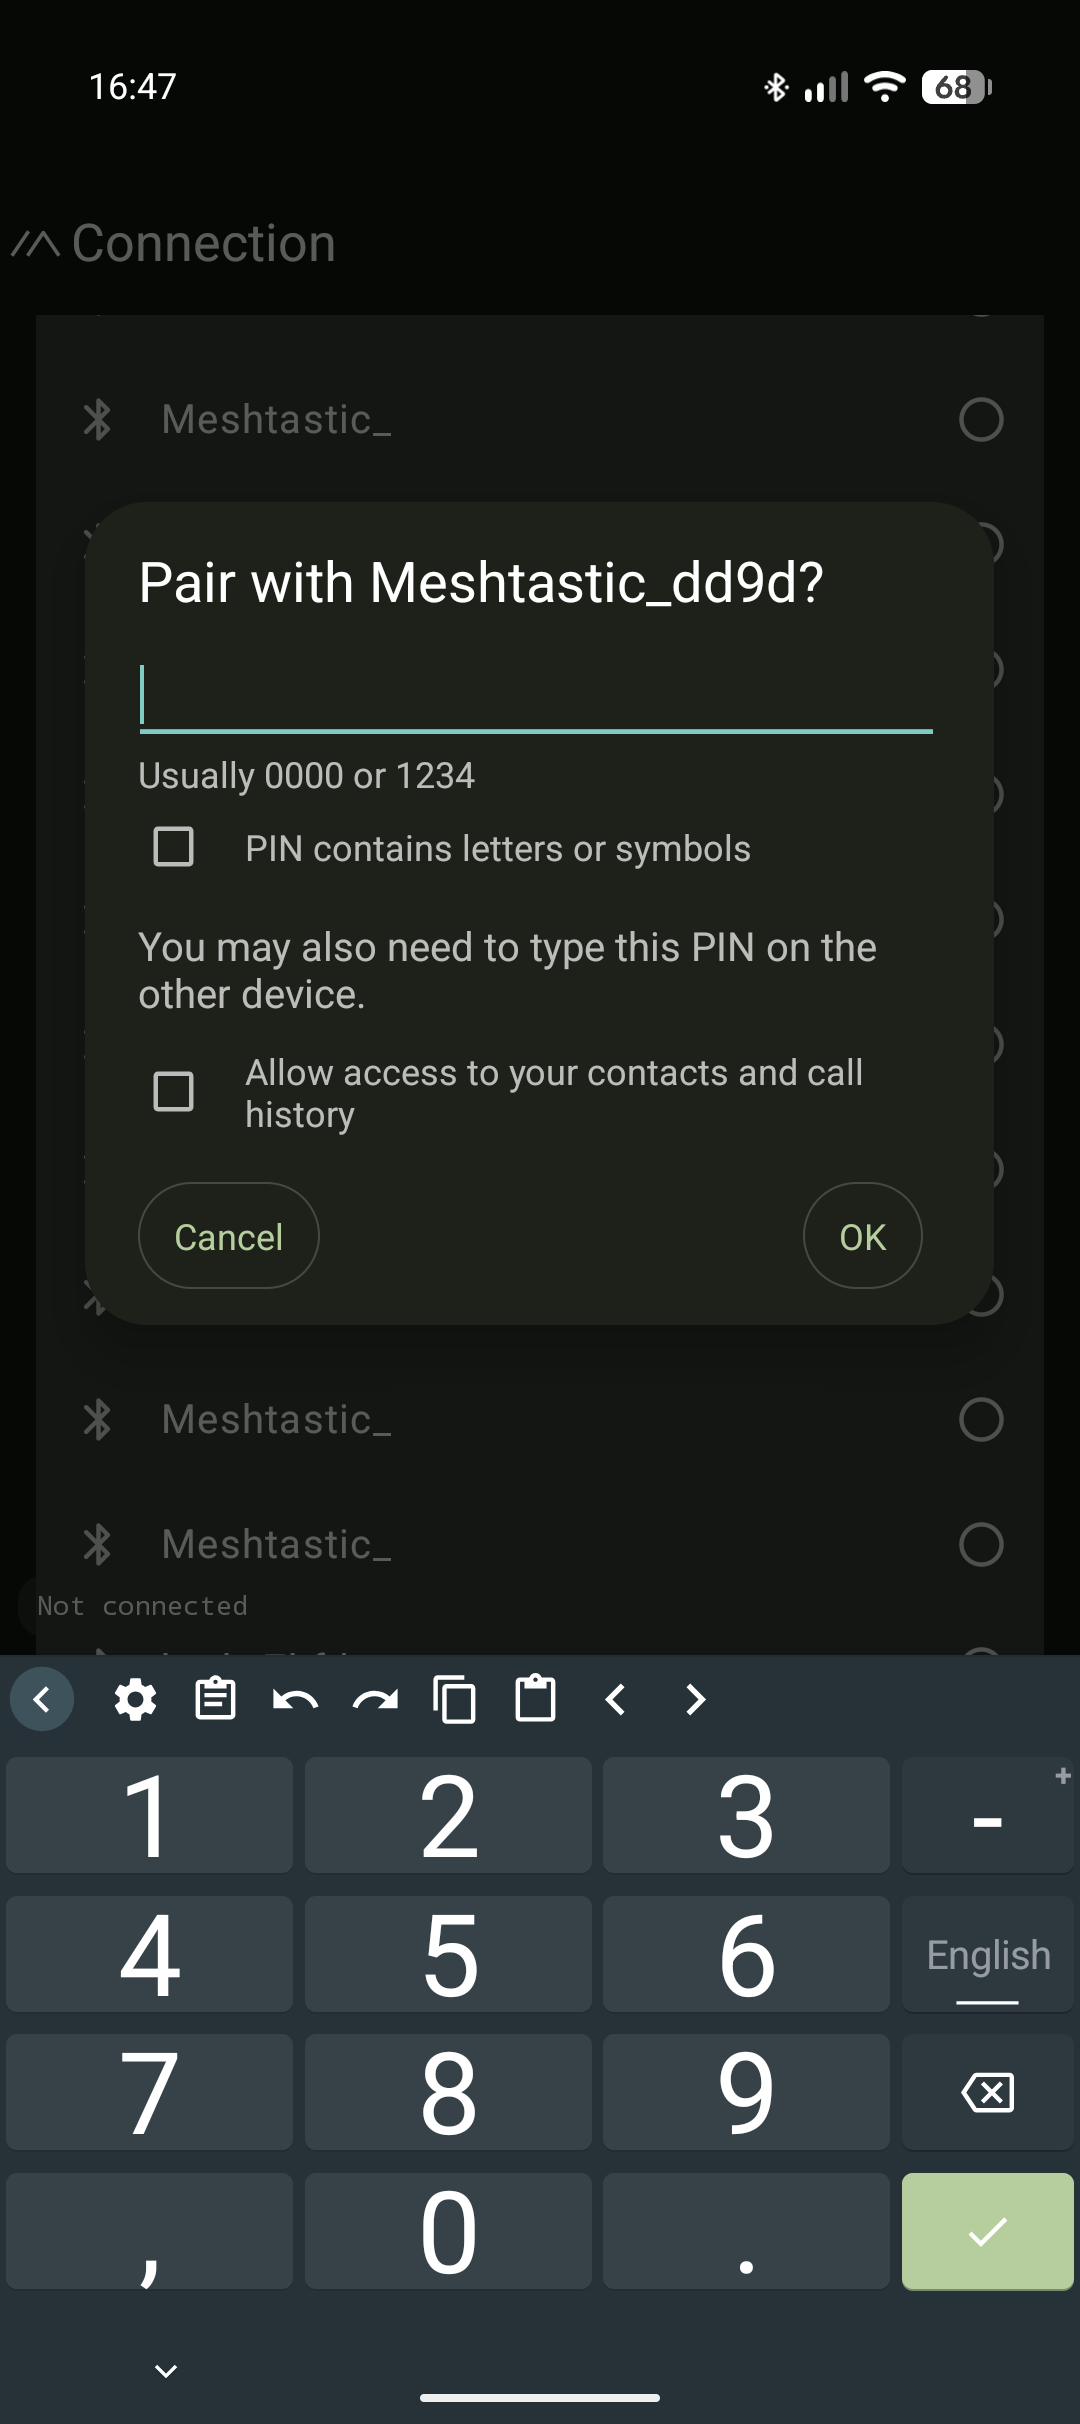
Connect to the device via Bluetooth 5.0 using the supported Meshtastic app.
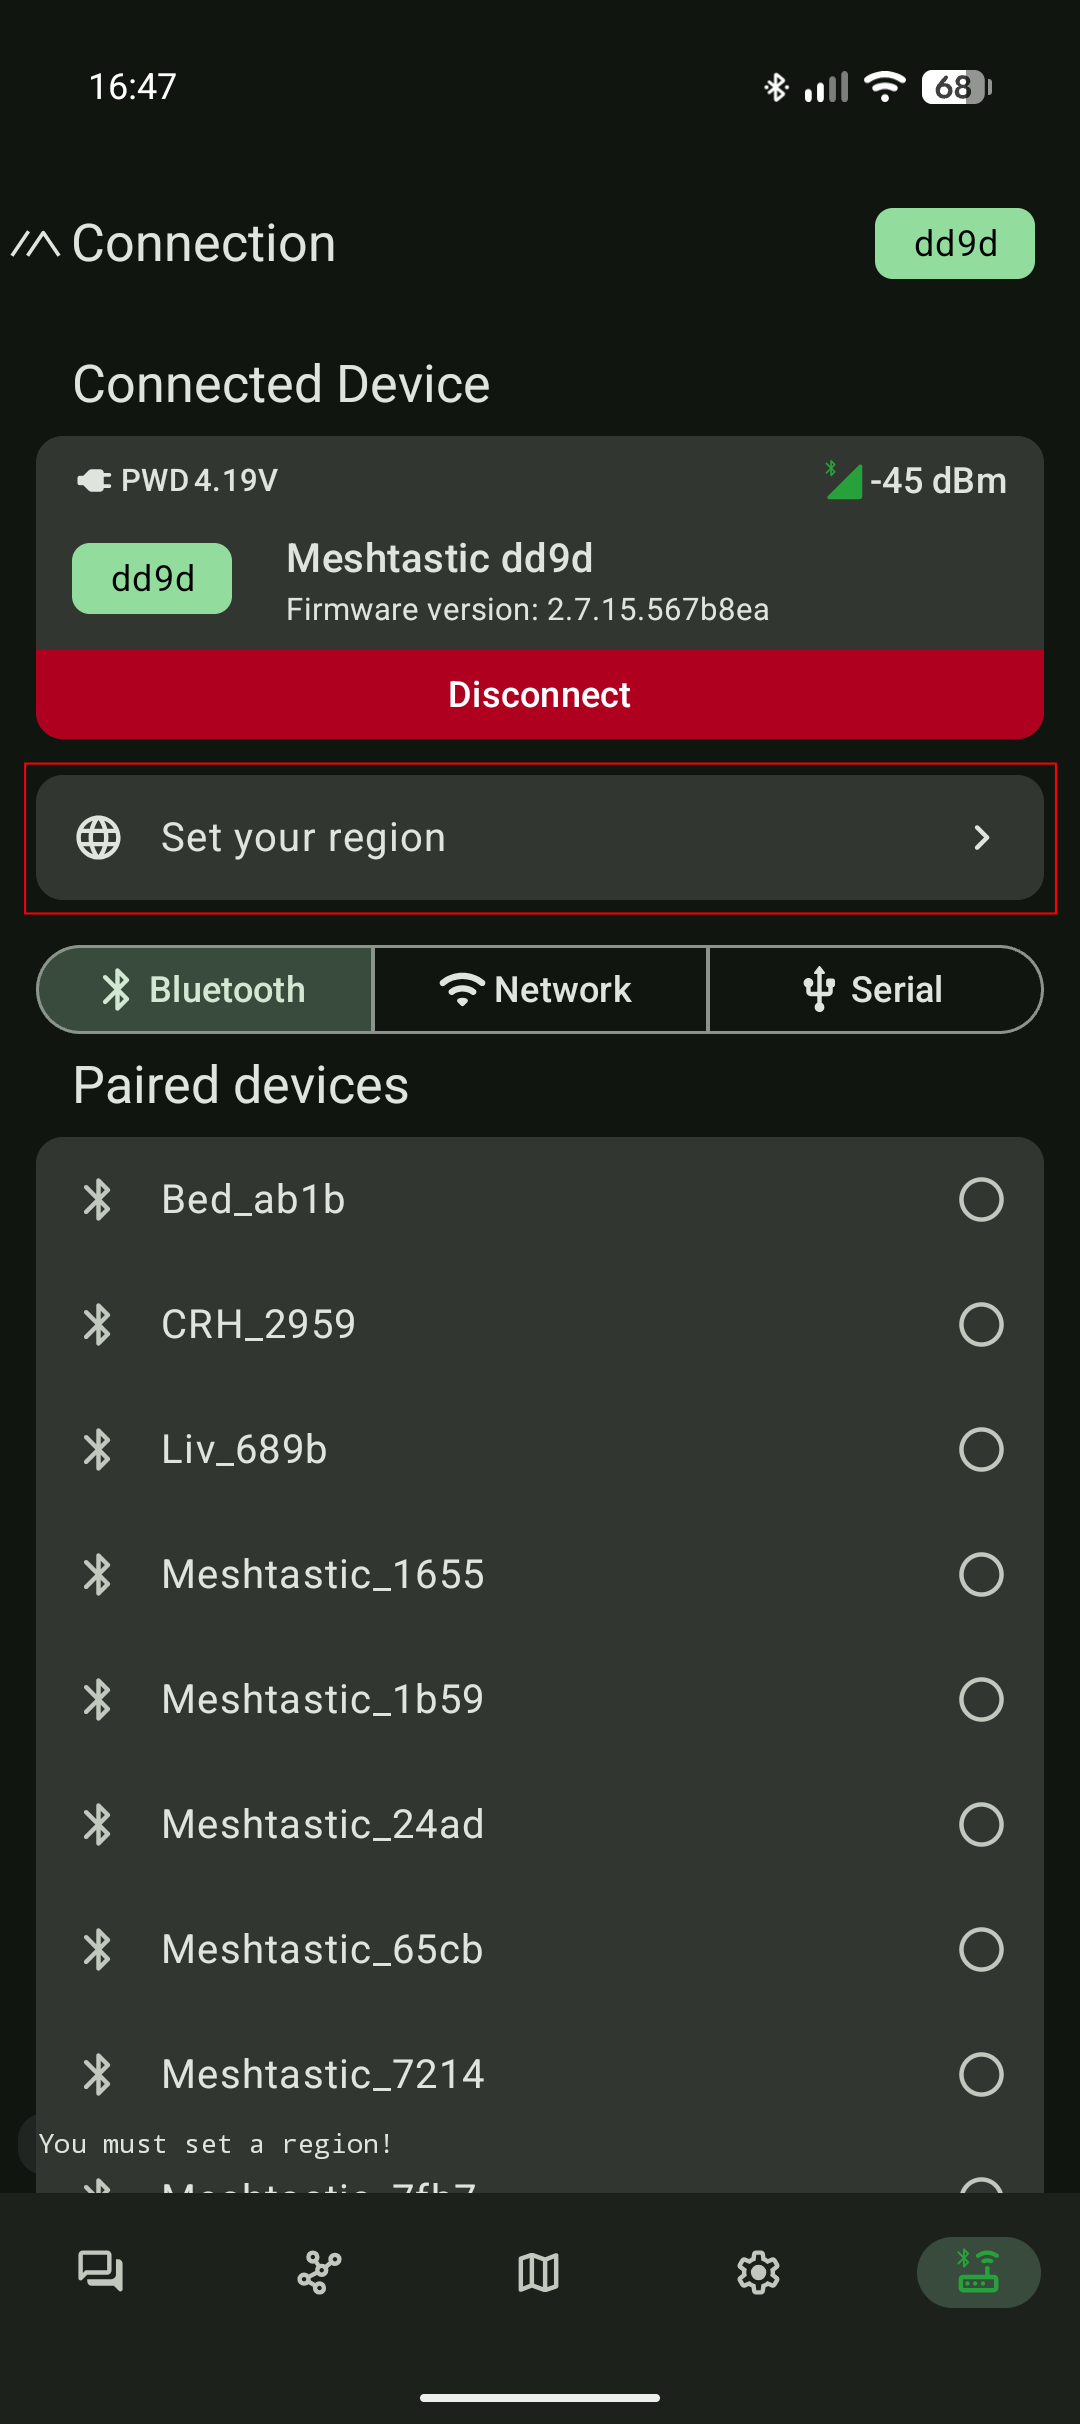
- Click on "Set your region"
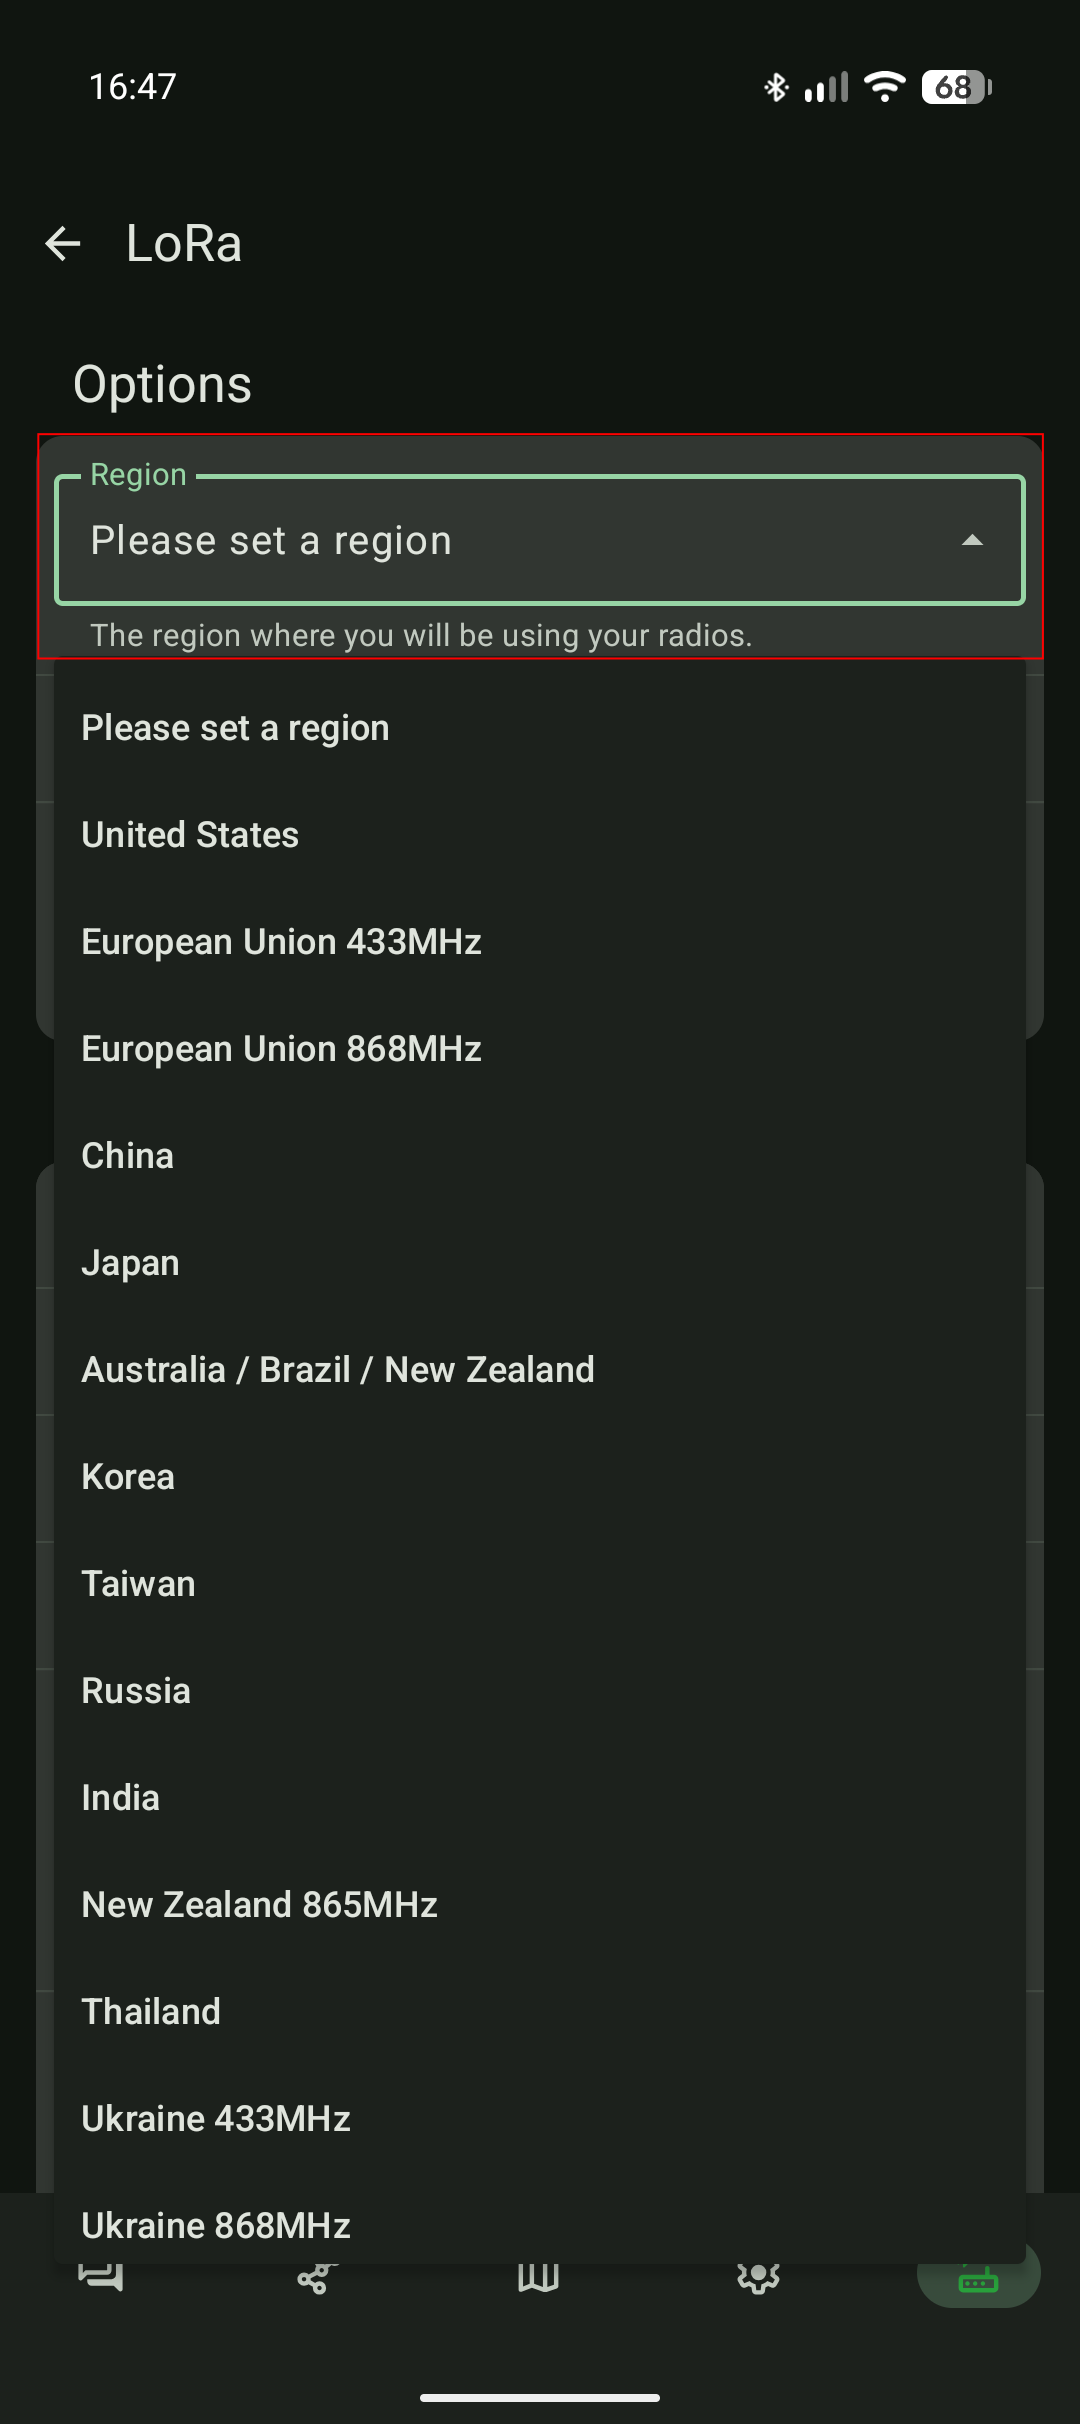
- Select the region matching your approximate location
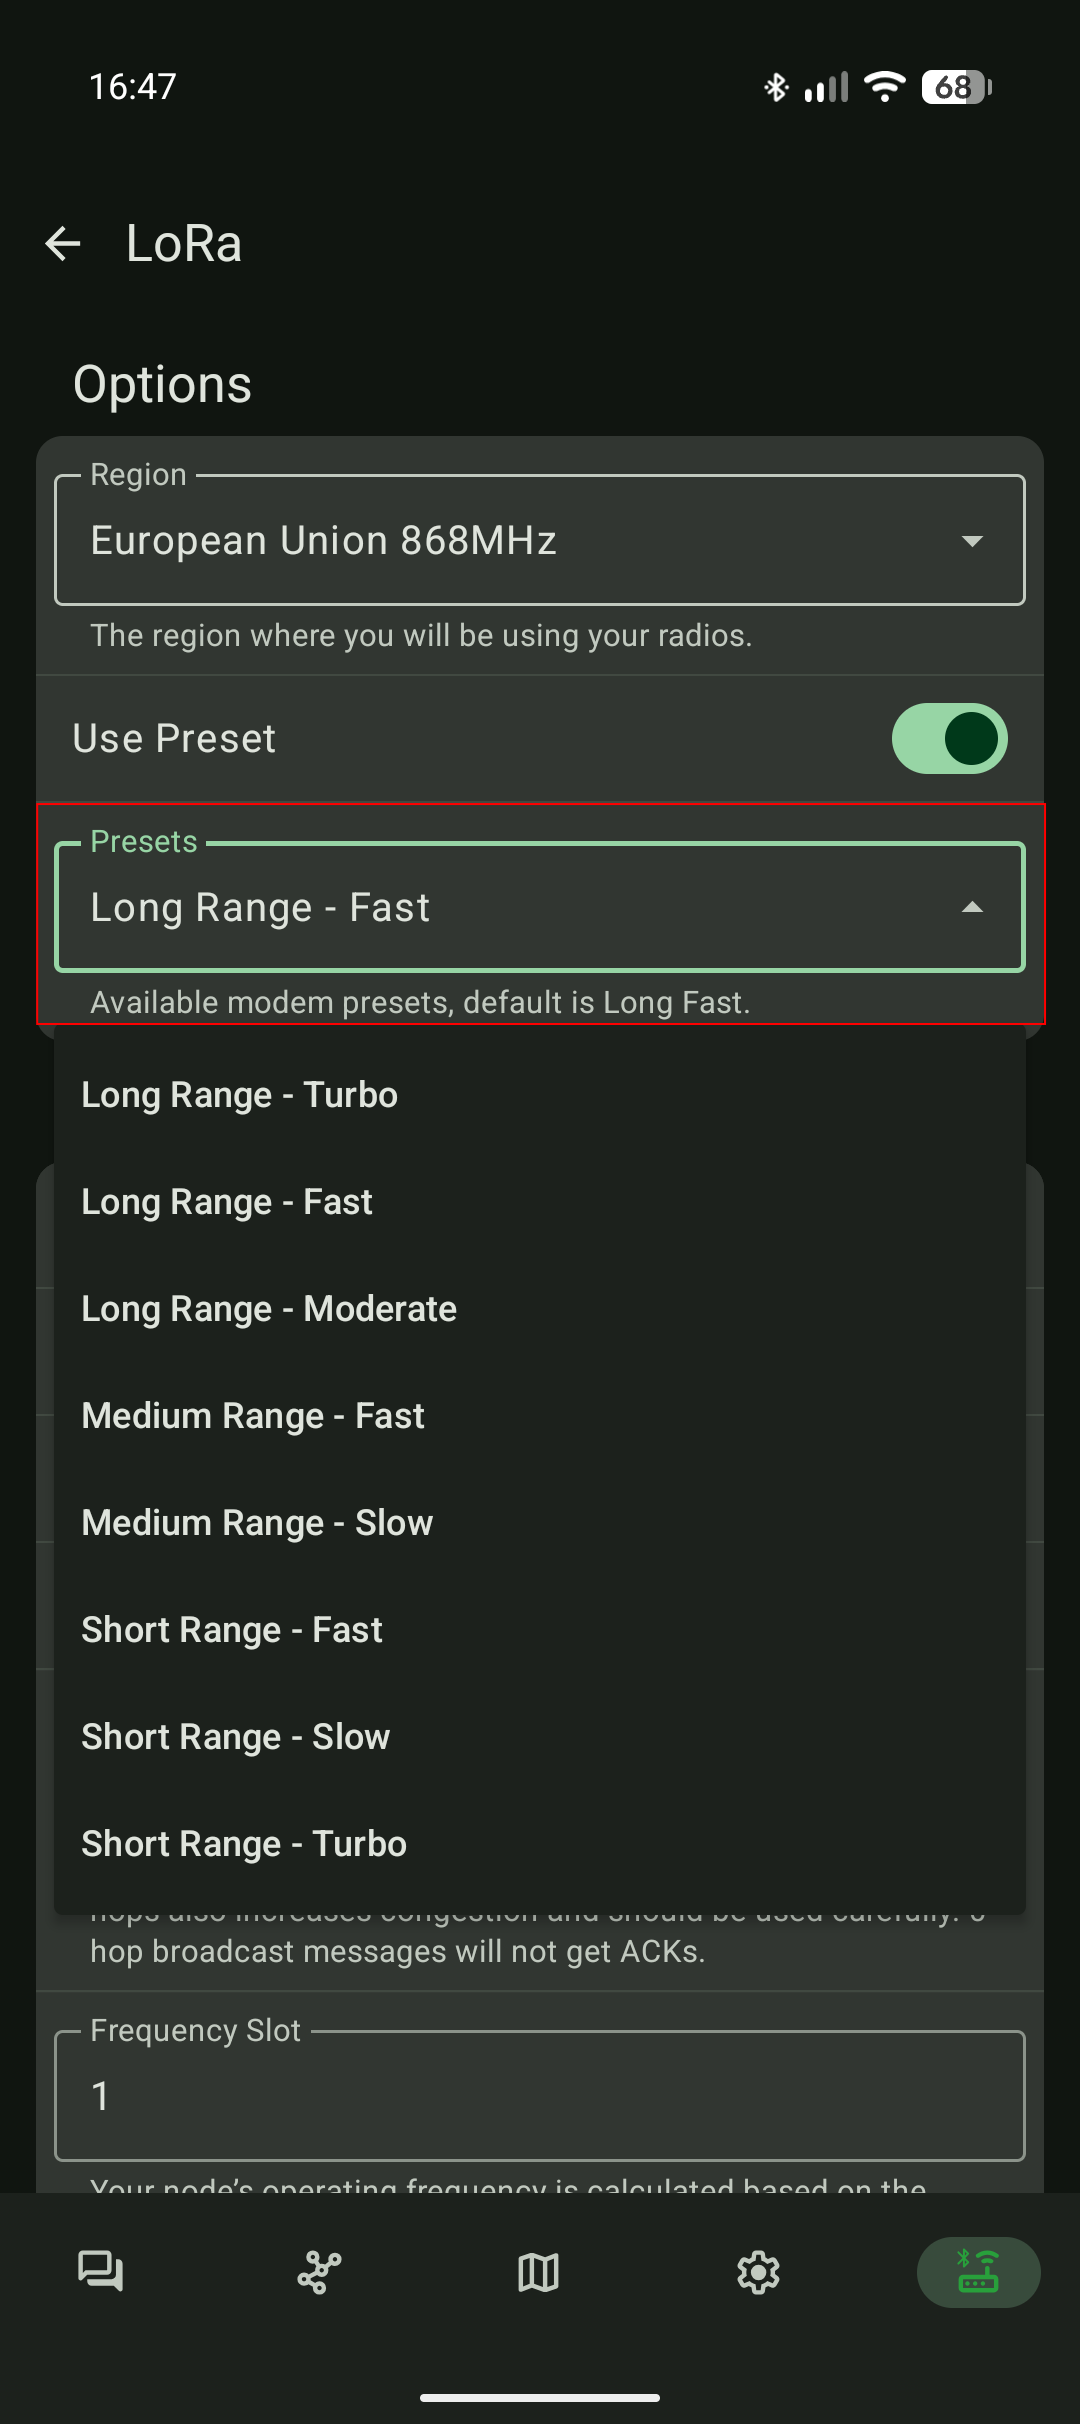
- Select the radio preset that you want to use and click on "Save" at the very bottom of the page. More details about radio presets here: meshtastic.org/docs/configuration/radio/lora
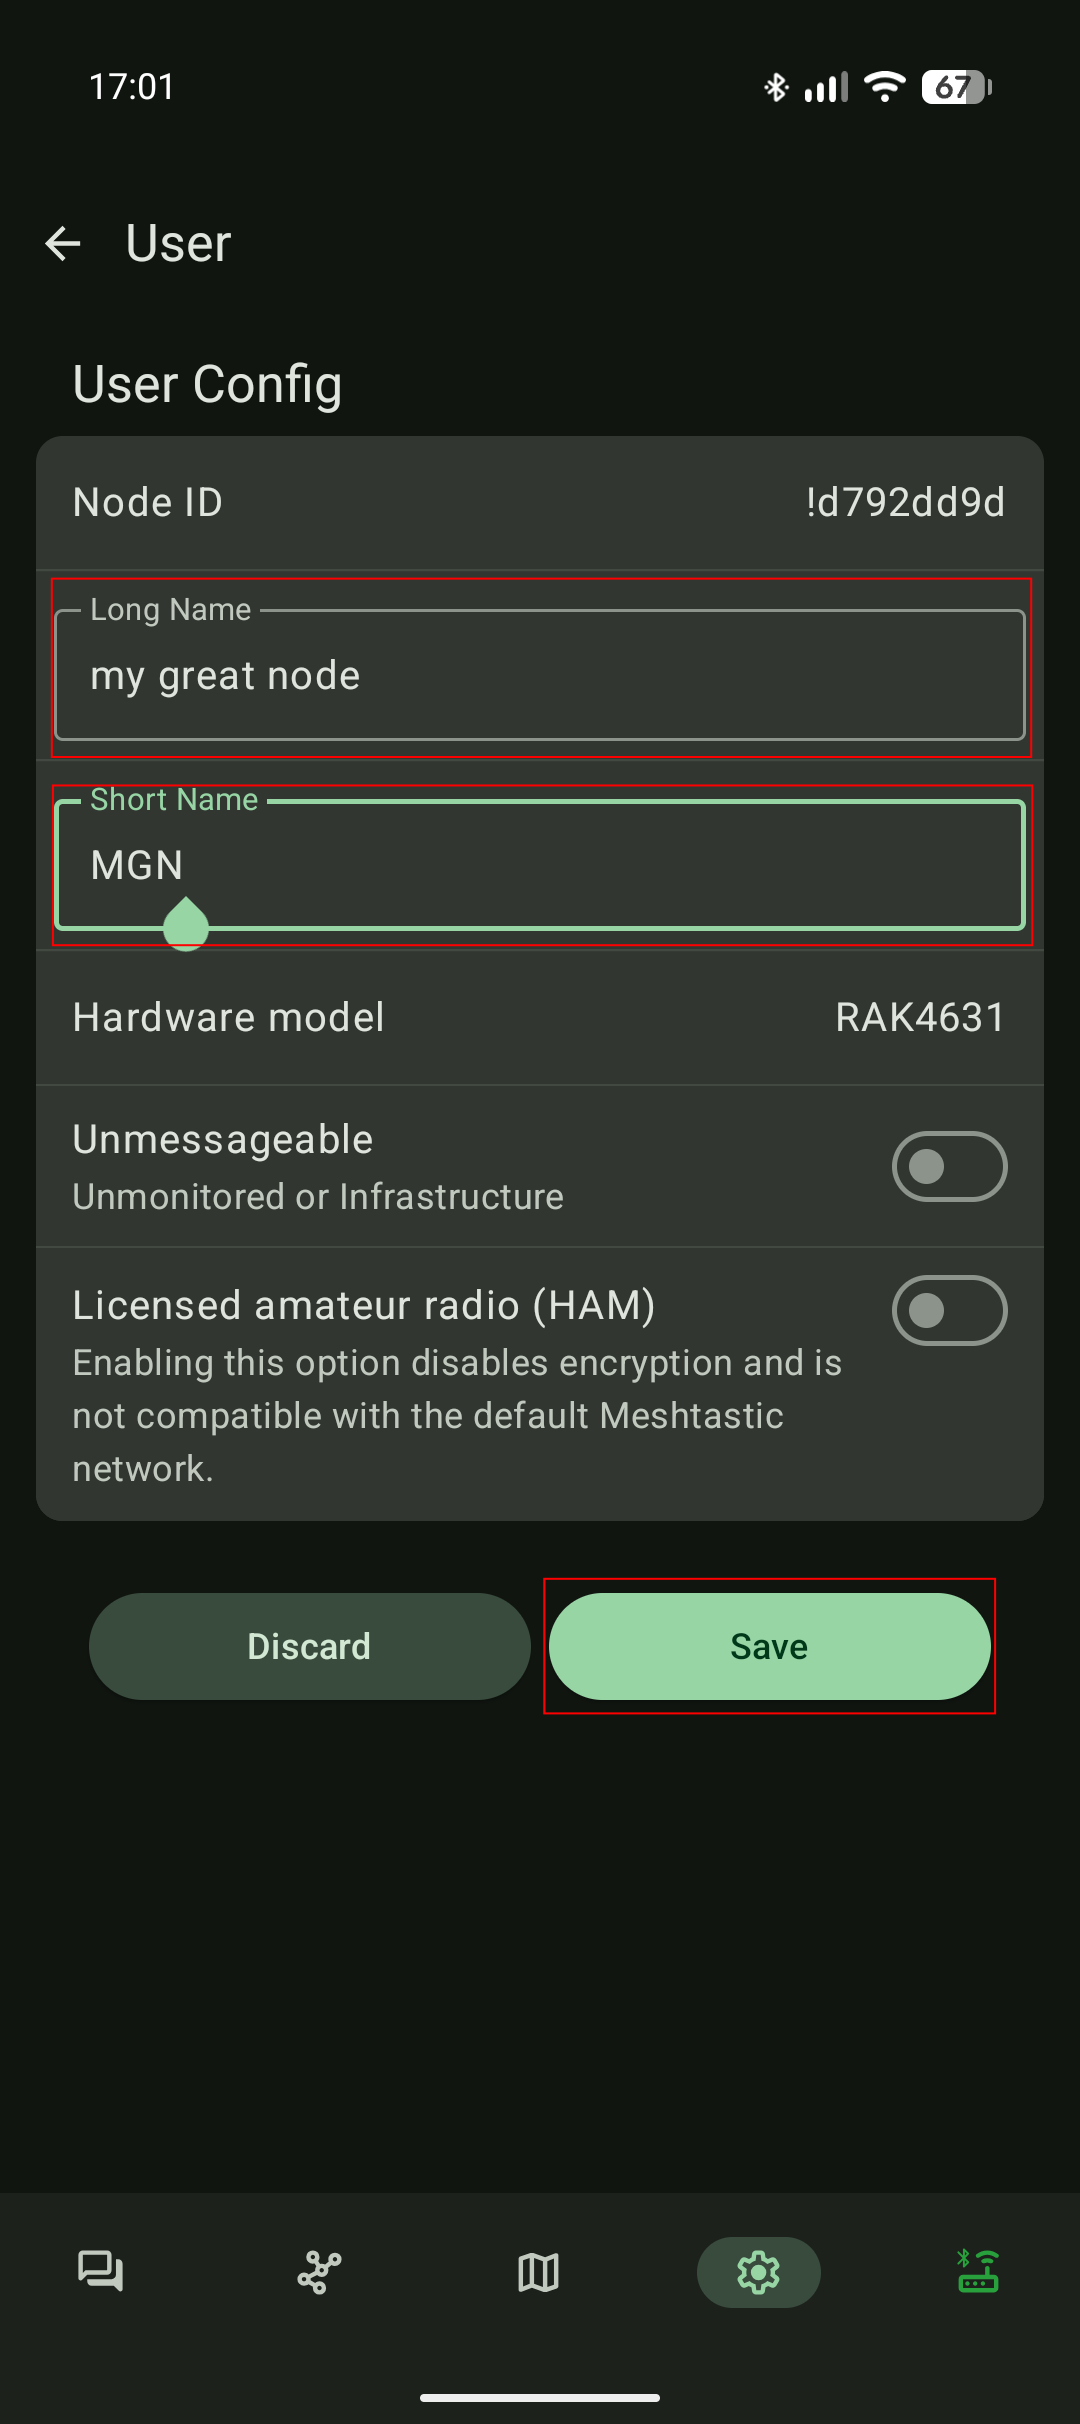
- Under "Device configuration > User" set the short and long name of your node. Those names are displayed to other Meshtastic users and is used as an identifier.
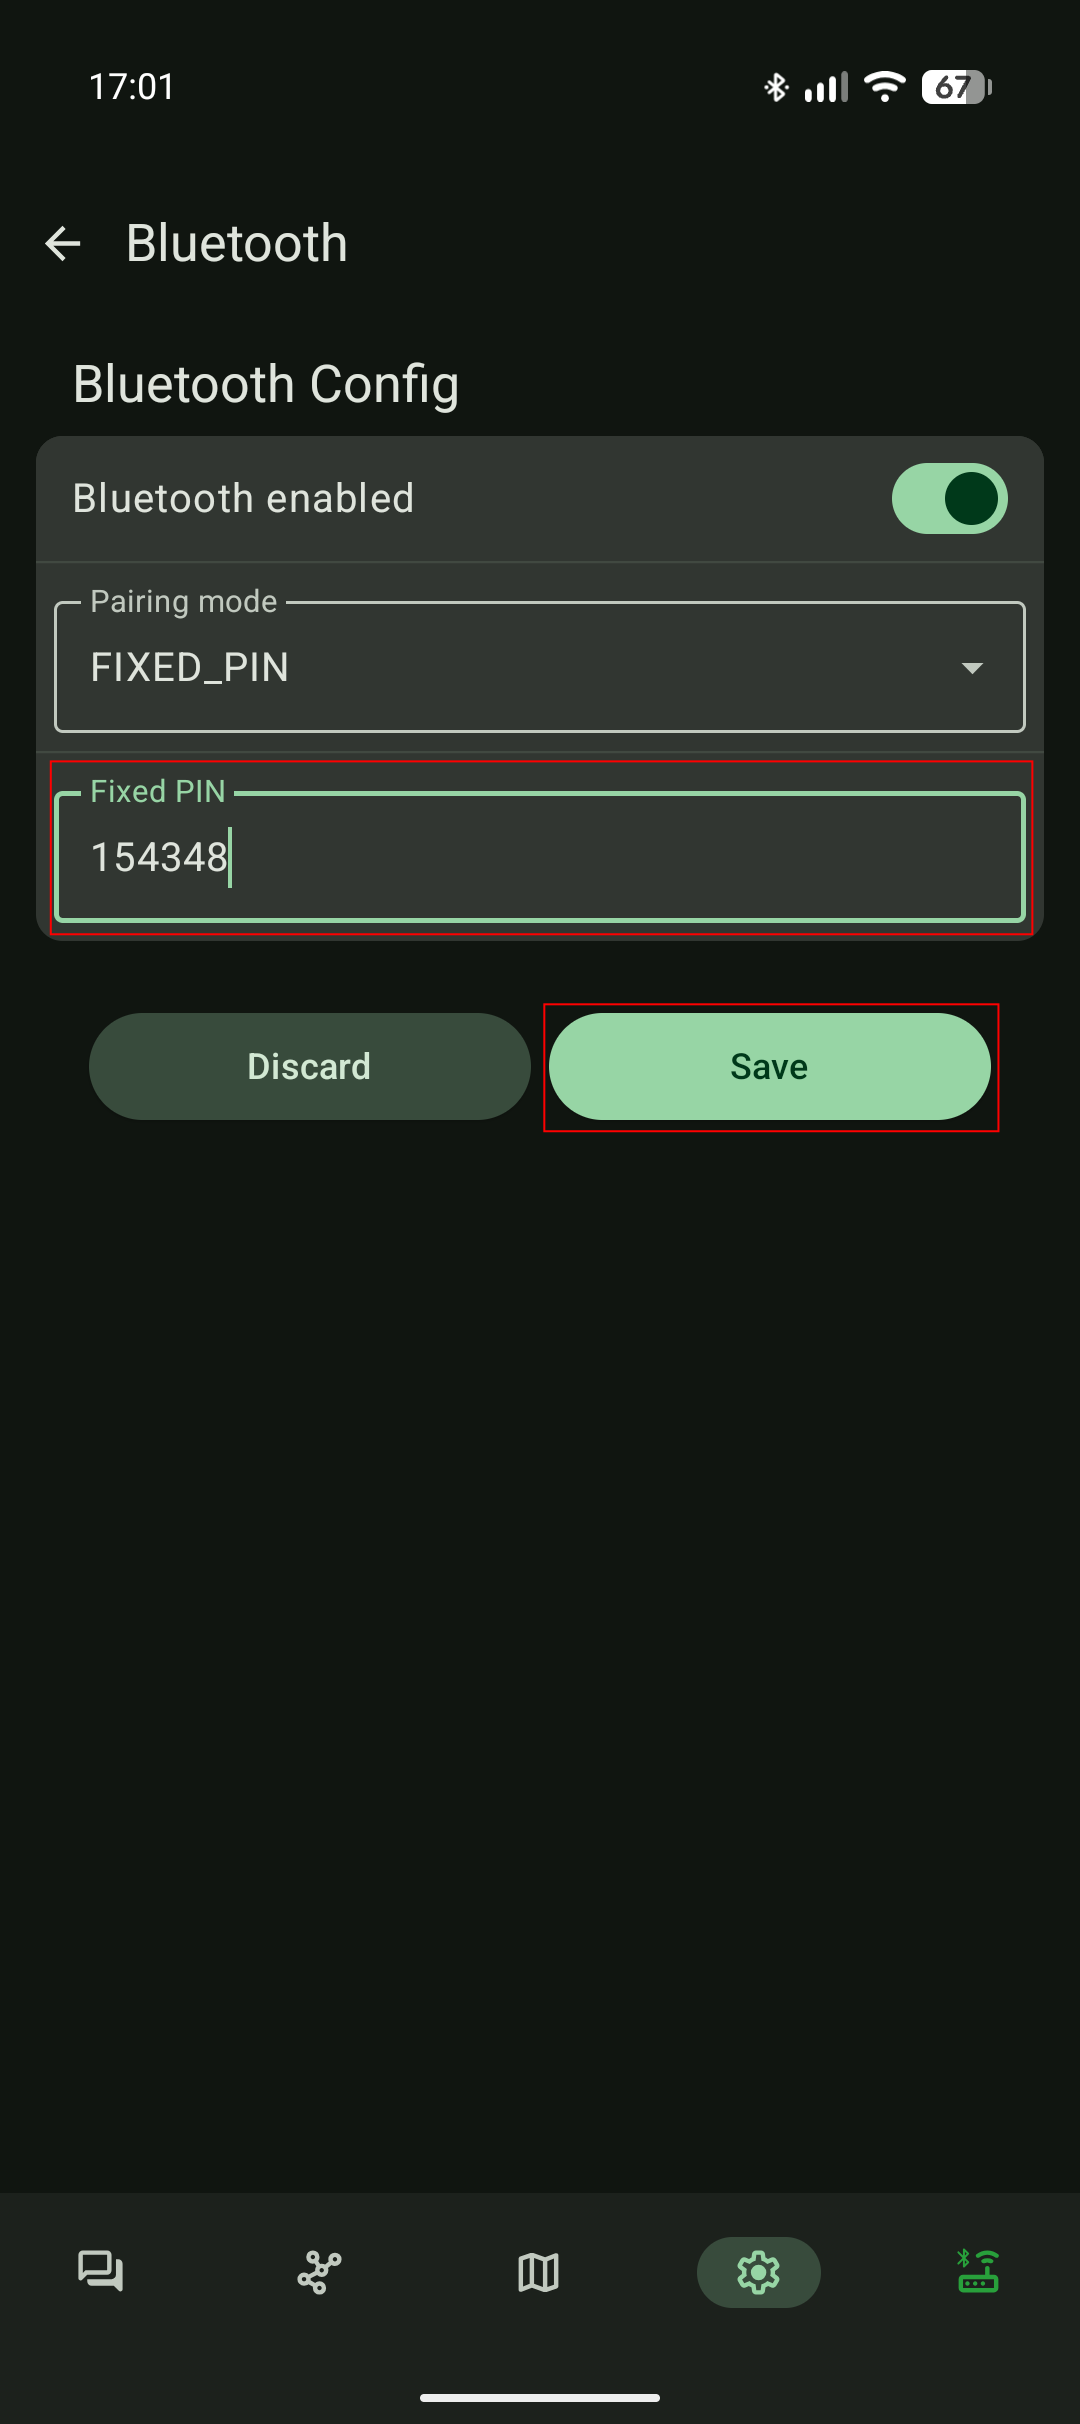
- Finally under "Device configuration > Bluetooth" set a custom Bluetooth PIN for your Meteor.
Default Bluetooth password: 123456
3.  4.
4. 5.
5.
6.  7.
7. 8.
8.
- Check signal quality and GPS lock before field use.
-
To switch off, hold the Power button for min.5 seconds and wait until the LED turns off.