Installation and Operation
Intended use
The Meteor Pro is a portable long-range communication and navigation device.
It is intended for professional and outdoor operations in non-hazardous environments, where robust and secure communication is required.
Installation and placement
-
Install the device in a location that is free from excessive vibration, dust, or direct sunlight.
-
Ensure adequate ventilation around the unit (minimum 50 mm clearance) to prevent overheating.
-
Do not cover the enclosure or place it near heat sources such as radiators or stoves.
-
When mounted on a vehicle or structure, secure it firmly using the appropriate brackets or straps to prevent mechanical stress on the antenna or connectors.
-
Avoid bending or twisting the antenna during installation.
Power connection
-
The Meteor Pro operates from 5 V DC (USB-C).
If the device is powered OFF, connecting it to an external power source will power it ON. A full charge take approximately 3.5 hours.
-
Use only certified USB-C cables and power supplies rated for at least 1 A.
-
Do not power the unit while wet. If exposed to moisture, allow it to dry completely before connecting to USB-C.
-
Do not short-circuit or reverse the power polarity.
Operation
-
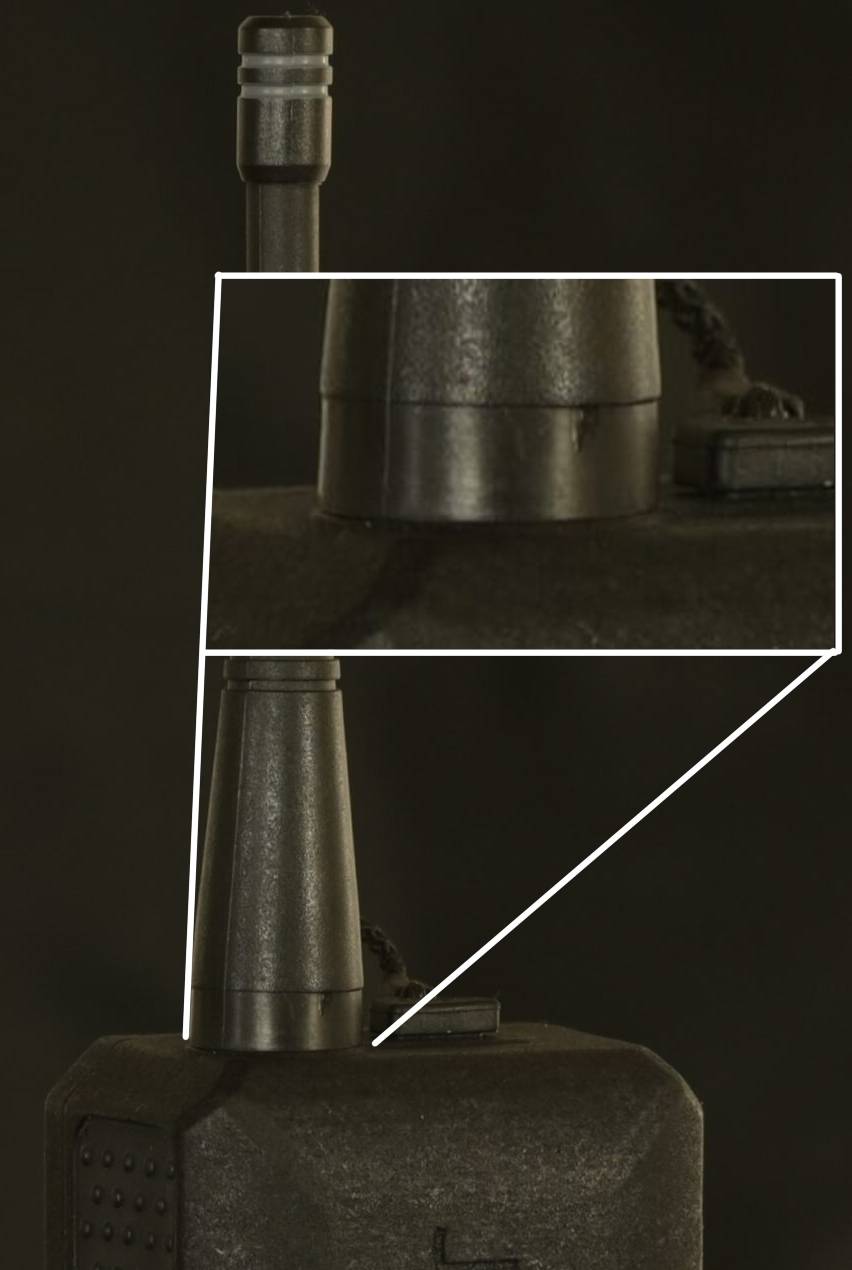
Attach the supplied antenna securely to the RF connector. Using only 2 fingers screw on the provided antenna on the RP-SMA antenna connector (3). Stop screwing once the antenna is flush with the enclosure.
-
Press on the Power button until the indicator LED lights up.
-
Connect to the device via Bluetooth 5.0 using the supported Meshtastic app or compatible firmware.
-
Check signal quality and GPS lock before field use.
-
To switch off, hold the Power button for min.5 seconds until the LED turns off.
Environmental considerations
-
Operating temperature: -20 °C to +60 °C
-
Relative humidity: 0 % to 100 % (non-condensing)
-
Suitable for indoor and outdoor use (IP65).
-
Not suitable for explosive (EEx) or flammable environments.
Improper installation or use may lead to electric shock, fire, or permanent damage to the unit.
Follow all power and mounting instructions precisely.
Antenna assembly
The antenna should be firmly screwed onto the RP-SMA connector but do not force. You may damage the antenna or the RP-SMA connector
Expected result: